Recovering a vSAN disk group from a failed ESXi host
In this post I’ll run through the steps required to recover a vSAN disk group from a failed ESXi host running vSphere 6.7 U3. If you need to recover data from a vSAN datastore after a situation like an ESXi host has died but the vSAN disks are intact, read on.
Do I need to do anything to recover vSAN after a failure?
Probably not. vSAN provides redundancy against hardware failures by automatically duplicating virtual machine components and distributing them across multiple hosts in accordance with the vSAN storage policy attached to the virtual machine. In the example of a vSAN cluster containing 3+ hosts, where virtual machines are configured with the vSAN Default Storage Policy, virtual machines will continue running in the event of any single host failure. If the cluster contains 4+ hosts, vSAN will rebuild any missing virtual machine objects which were stored on the failed host onto a new host by copying the objects from a surviving duplicate. This rebuild will start after a default timeout of 60 minutes.
So, in what scenarios might you need to recover a vSAN disk group from a failed ESXi host? A few come to mind:
- You are running a small home lab environment with only a single vSAN host.
- You are running a vSAN Failures to Tolerate configuration of zero.
- You have had more failures than your vSAN Failures to Tolerate configuration can withstand.
In each of these scenarios, the problem is the same. vSAN doesn’t have enough surviving copies of a virtual machine’s objects to rebuild the data onto a new host. Therefore, we want to take functional vSAN disks from a failed host and put them into a new host we’ve built, put that new host into the cluster, and get our data back! Let’s look at this process both with, and without, access to vCenter.
Scenario background
Here I’ve got a 3-node cluster and a virtual machine called ubuntu-vm01. The ESXi hosts are actually running as nested virtual machines within a vSphere environment, but nothing much changes if you are dealing with physical hosts.
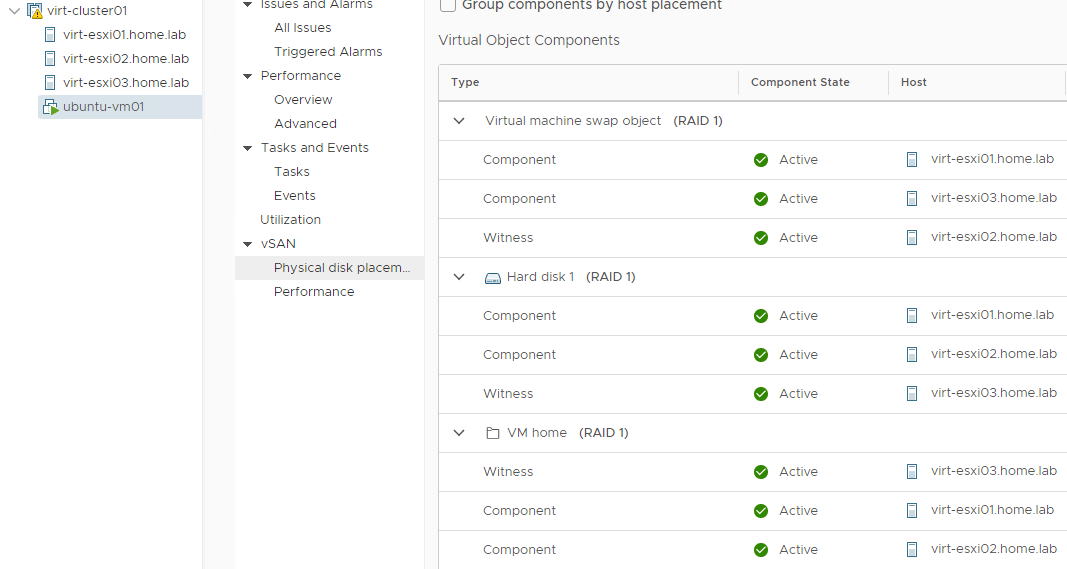
Each of my hosts in this cluster are configured with a 10 GB cache disk and a 100 GB capacity disk. My VM has been configured with the vSAN Default Storage Policy which creates three components per virtual machine object (two mirror components and one witness component) and distributes them across each of my hosts. You can see this virtual object placement in the picture below.
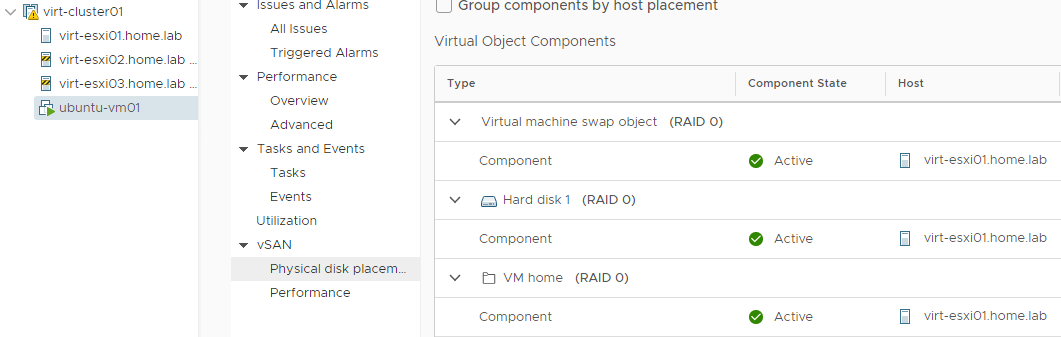
Now, in order to create the conditions for this scenario, I have created a new vSAN storage policy with a Failures to Tolerate (FTT) setting of zero. FTT=0 prevents vSAN from creating multiple copies of a virtual machine’s components and distributing them across multiple hosts. There will only be a single copy of each of the VM’s components. To push these components onto a single host, I have placed virt-esxi02.home.lab and virt-esxi03.home.lab into maintenance mode with the “ensure accessiblity” option. This makes vSAN migrate any components for this virtual machine onto the only host in the cluster which is not in maintenance mode: virt-esxi01.home.lab. You can see this new virtual object placement in the picture below.
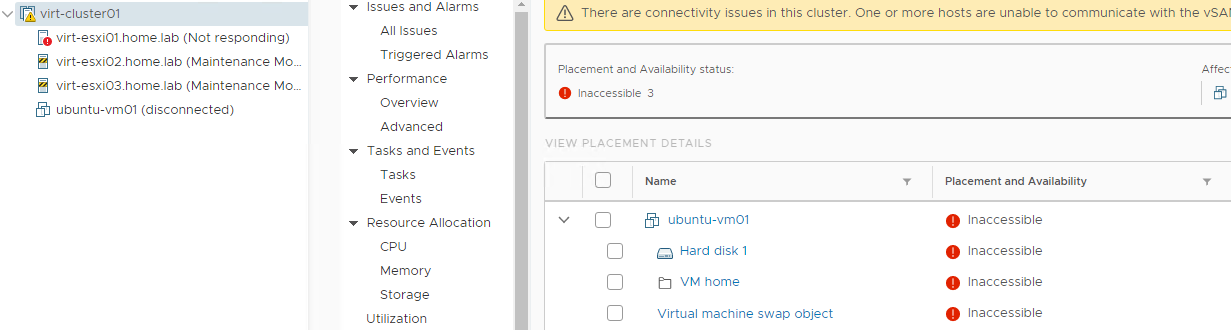
At this point in the scenario I’ll simulate an unrecoverable failure of my host virt-esxi01.home.lab. You could imagine the mainboard has failed and I’m unable to get a replacement. In my case, as the host is running as a virtual machine nested within another vSphere environment, I’ve just powered off the virtual machine. The host is now listed as not responding and the ubuntu-vm01 virtual machine is listed as disconnected. If I take a look at the cluster level, I can see in Monitoring > Virtual Objects that my VM’s objects are listed as inaccessible.
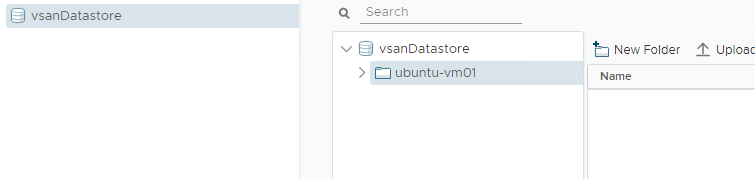
Browsing the files on the vSAN datastore in the storage tab, I can see the virtual machine’s folder, but the folder is empty.
If this is an environment like a home lab where I’m running everything (including my vCenter Server appliance) on one host, or if I’ve had more failures than my FTT configuration can withstand, then at this point vCenter will be unavailable too.
Recovery steps
At this point in the scenario I’ve simulated an unrecoverable failure of my host virt-esxi01.home.lab. However, maybe I have another server sitting in a box unused, and I want to recover my vSAN data using this host. The steps involved in achieving this are:
- Build the new host with ESXi and implement the vmkernel networking for vSAN in the environment.
- Power off the new ESXi host and attach or insert the vSAN disks from the failed host into the new host.
- (optional) If you have access to vCenter, power on the new host and add it to the cluster.
- Power on the new host and check the disks are marked correctly as flash or HDD.
- Mount the vSAN disk group.
- Remove the new host from maintenance mode.
- Power on the virtual machines.
Let’s get to it!
Steps 1 - 2: I’ve built my new ESXi host and configured its vmkernel networking for vSAN. As my host is a nested virtual machine, I’ve attached the VMDK files for my cache and capacity disk to a new virtual machine as existing hard disks. Ideally, you would ensure that each disk has the same device ID as it did on the previous cluster to maintain consistency. If this is not possible for some reason, like if the new hardware is different, everything should still work as each vSAN disk stores metadata about itself.
From here, the next steps will differ depending on whether or not you have access to vCenter.
With access to vCenter
Steps 3 - 4: At this point my host is visible in vCenter. For step 4, to verify that the disks are correctly marked as flash or HDD, I’ve powered on the host, and can see the storage devices present under Configure > Storage Devices. I can also see that both my 10G GB cache disk and 100 GB capacity disk are correctly marked as flash. If the drive type was listed incorrectly, I can select it and click the Mark as HDD disk or Mark as flash disk button. All of this is shown below.

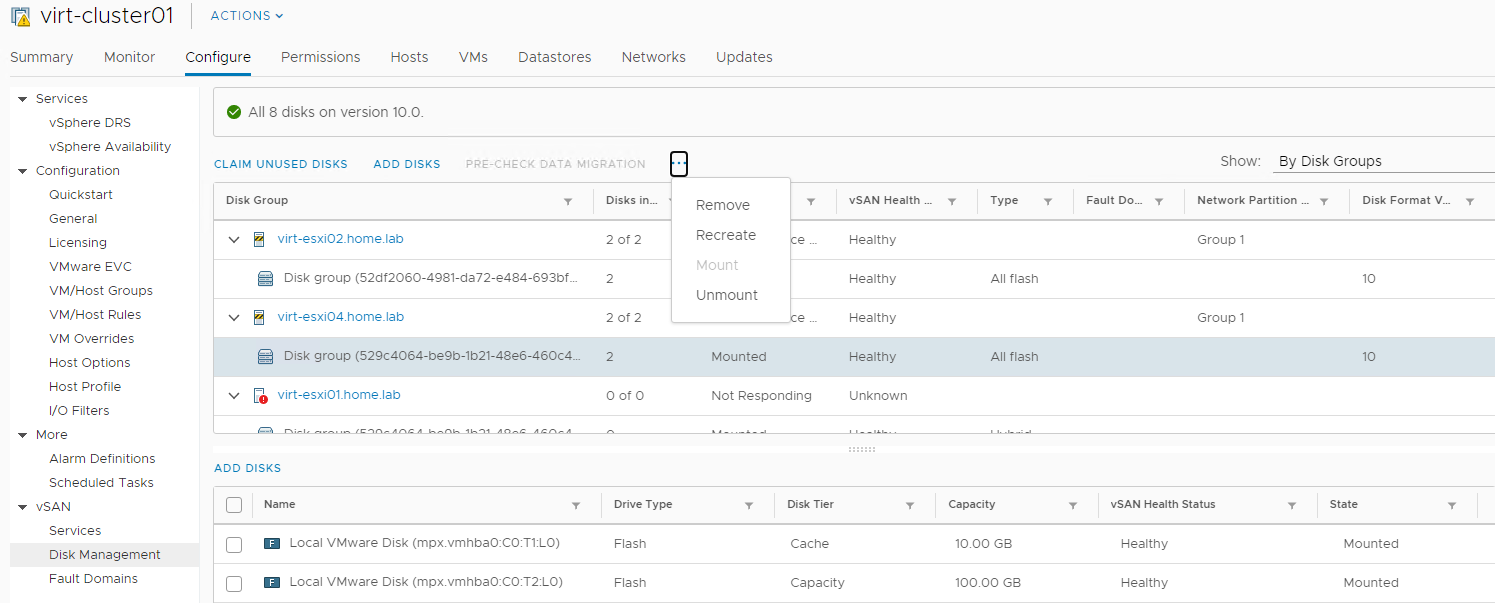
Step 5: To mount the vSAN disk group, on the cluster I go to Configure > Disk Management and find my host in the list. Here, the disk group is already detected and mounted. vSAN may automatically mount the disk group, but if not you can select the disk group and mount it.
Note: Do not remove or recreate the disk group, as all data on the disk group will be lost!
Step 6: I remove the new host from maintenance mode. At this point, if I browse the files on the vSAN datastore in the storage view, I would see that I can now expand my virtual machine’s folder and see the virtual machine’s files.
Step 7: My virtual machine is still listed as being disconnected since it was registered to virt-esxi01.home.lab during the failure. To remove the disconnected VM, I can remove virt-esxi01.home.lab from the inventory, which will also remove all virtual machines registered to it. I can then browse to the virtual machine’s .vmx file on the vSAN datastore and use the Register VM button to re-add the virtual machine to the inventory. Another option, instead of removing virt-esxi01.home.lab and re-registering the VM, is to use the Move-VM cmdlet in PowerCLI to move the virtual machine to virt-esxi04.home.lab. Note that you can’t to migrate the VM through vCenter UI while it’s in a disconnected state.
1Get-VMHost virt-esxi01.home.lab | Get-VM | Move-VM -Destination (Get-VMHost virt-esxi04.home.lab)
Yet another option is to use the vim-cmd CLI commands on the new host to power on the virtual machine. This allows you to skip re-registering or moving any virtual machines. Instructions for this are in the next section.
Once the VM is re-registered or moved, I can power it on. Job done!
Without access to vCenter
Steps 1 - 2: I’ve built my new ESXi host and configured its vmkernel networking for vSAN. I’ve also enabled SSH so I can connect to the CLI remotely.
Step 4: I connect to the host via SSH and run esxcli vsan storage list to verify my storage configuration. The main things I’m looking for here are confirming that the vSAN disks have been detected, that they’re correctly marked as SSD or HDD, whether they are correctly marked as cache or capacity, and whether the disk is mounted. The relevant lines are highlighted below.
 1[root@virt-esxi04:~] esxcli vsan storage list
 2mpx.vmhba0:C0:T1:L0
 3   Device: mpx.vmhba0:C0:T1:L0
 4   Display Name: mpx.vmhba0:C0:T1:L0
 5   Is SSD: true
 6   VSAN UUID: 5265c296-b3be-02b4-3b10-651b7bf27d44
 7   VSAN Disk Group UUID: 5265c296-b3be-02b4-3b10-651b7bf27d44
 8   VSAN Disk Group Name: mpx.vmhba0:C0:T1:L0
 9   Used by this host: true
10   In CMMDS: true
11   On-disk format version: 10
12   Deduplication: false
13   Compression: false
14   Checksum: 5640020993564124927
15   Checksum OK: true
16   Is Capacity Tier: false
17   Encryption Metadata Checksum OK: true
18   Encryption: false
19   DiskKeyLoaded: false
20   Is Mounted: false
21   Creation Time: Mon Sep 12 07:21:09 2019
22
23mpx.vmhba0:C0:T2:L0
24   Device: mpx.vmhba0:C0:T2:L0
25   Display Name: mpx.vmhba0:C0:T2:L0
26   Is SSD: true
27   VSAN UUID: 52780dff-4cbf-57b6-8dd5-4df46c5e0707
28   VSAN Disk Group UUID: 5265c296-b3be-02b4-3b10-651b7bf27d44
29   VSAN Disk Group Name: mpx.vmhba0:C0:T1:L0
30   Used by this host: true
31   In CMMDS: true
32   On-disk format version: 10
33   Deduplication: false
34   Compression: false
35   Checksum: 15721419088695166693
36   Checksum OK: true
37   Is Capacity Tier: true
38   Encryption Metadata Checksum OK: true
39   Encryption: false
40   DiskKeyLoaded: false
41   Is Mounted: false
42   Creation Time: Mon Sep 12 07:21:09 2019
Step 5: In my case, the disks are correctly marked as SSD, and correctly marked as capacity or cache, but the disk group is not mounted. To mount the disk group, I need to get the vSAN Disk Group UUID from the output above, and use the esxcli vsan storage datastore mount command:
1esxcli vsan storage diskgroup mount --uuid 5265c296-b3be-02b4-3b10-651b7bf27d44
Step 6: Remove the host from maintenance mode using esxcli system maintenanceMode set --enable false.
Step 7: Power on the virtual machines using the vim-cmd vmsvc commands. Find the virtual machine you want to power on (in my case, ubuntu-vm01, but in your case possibly the vCenter Server Appliance), get it’s Vmid, and use that with the power-on command.
1[root@virt-esxi04:~] vim-cmd vmsvc/getallvms | grep ubuntu-vm01
2Vmid       Name                                       File                                      Guest OS      Version   Annotation
34      ubuntu-vm01   [vsanDatastore] 6b1b5f5f-e34f-b072-aeac-005056ae7ebd/unbuntu-vm01.vmx   ubuntu64Guest   vmx-14
4[root@virt-esxi04:~] vim-cmd vmsvc/power.on 4
5Powering on VM:
Conclusion
Hopefully this helps someone out there who has lost some vSAN data due to a host failure (or multiple failures) and is unsure how to get the data back. If you have any questions or comments, leave a comment below!
comments powered by Disqus